How to Sell Merch on Spotify: A Step-by-Step Guide
Jan 08, 2026
Selling merch on Spotify lets artists turn listeners into customers without sending fans away to external stores. Instead of relying only on streaming income, you can showcase and sell products directly on your artist profile, release pages, and the Now Playing screen.
This guide breaks down exactly how to sell merch on Spotify, step by step, using Spotify for Artists and Shopify, even if you are an independent artist with no inventory.
- Step 1. Create and Prepare Your Merch
- Step 2. Connect Shopify to Spotify for Artists
- Step 3. Publish Merch from Shopify to Spotify
- Step 4. Feature and Tag Your Merch
- Step 5. Manage and Refresh Merch Regularly
- FAQs
Step 1. Create and Prepare Your Merch
Before you connect anything to Spotify, you need merch that is ready to sell. Think of creative merch ideas that you feel will connect best with your fans.
Decide What to Sell
Choose products your fans are likely to buy:
- T-shirts, hoodies, caps
- Posters, vinyl, CDs
- Limited edition or release-specific merch
Physical merch performs best on Spotify, especially items tied to a new release or visual identity.
Choose How You’ll Fulfil Orders
You have two main options:
- Print on demand merch for musicians using services like Printify or Printful
- Holding your own inventory and shipping manually
Print on demand is ideal for most independent artists because there is no upfront cost or storage.
Prepare Your Product Assets
Make sure each product includes:
- High-quality product images
- Clear product titles and descriptions
- Accurate pricing, sizes, and variants
Your merch must follow Spotify’s guidelines, meaning no copyrighted material you do not own and no prohibited products.
Step 2. Connect Shopify to Spotify for Artists
To sell merch on Spotify, you must use Shopify.
Set Up Spotify for Artists
- Claim and verify your artist profile
- Log in to your Spotify for Artists dashboard
This is where you manage your profile, releases, and merch placement.
Set Up Your Shopify Store
- Create a Shopify account
- Add your merch products
- Connect a print on demand partner if you are not holding inventory
Shopify acts as the backend for payments, orders, and fulfilment.
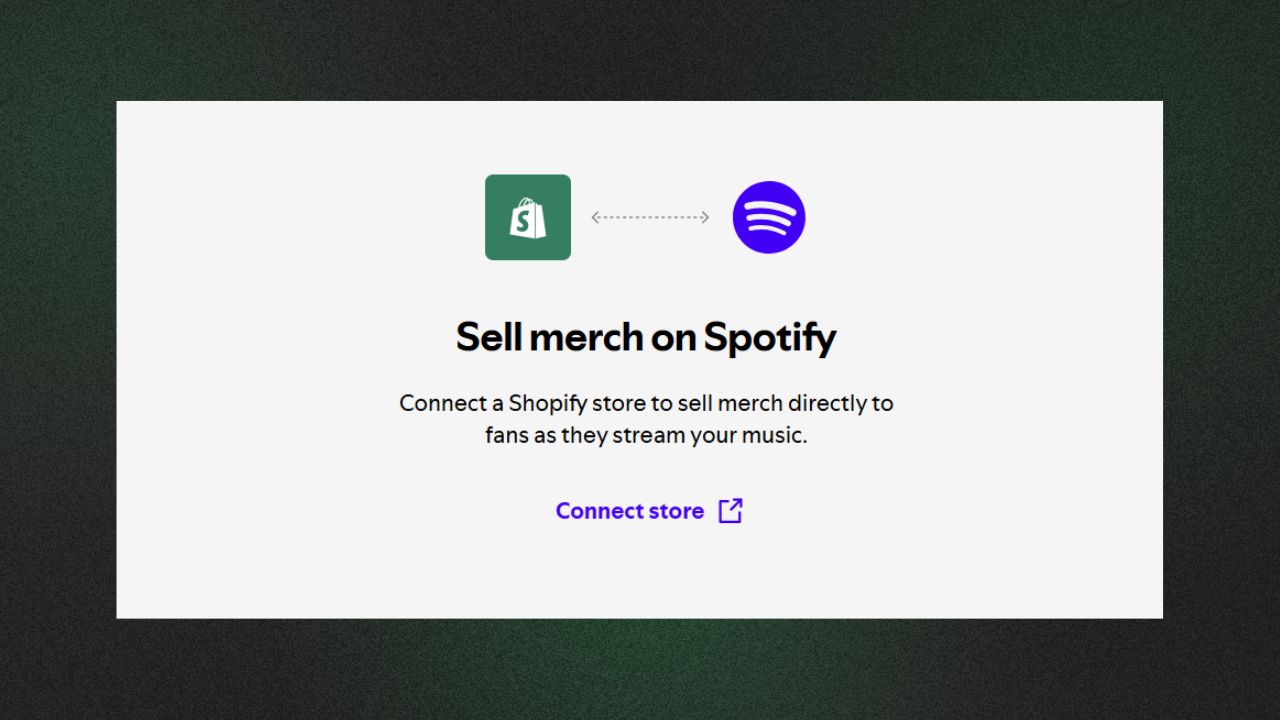
Link Shopify to Spotify
Inside Spotify for Artists:
- Go to Profile > Merch
- Click “Log in to Shopify”
- Authorize the connection
Once connected, Spotify can pull products directly from your Shopify store.
Step 3. Publish Merch from Shopify to Spotify
After connecting Shopify, you need to publish your products to Spotify.
Enable Spotify as a Sales Channel
In Shopify:
- Go to Products
- Select a product
- Enable Spotify under sales channels
Only enabled products will appear in Spotify for Artists.
Submit Products for Review
Spotify reviews each product before it goes live, as this helps them maintain quality and compliance. And these approvals usually take a few days, but timelines may vary. So keep this in mind while planning your timelines for announcing merch drops.
Confirm Merch Is Live
Once approved, your merch can appear:
- On your Spotify artist profile
- On album and single pages
- In the Now Playing view
This is where Spotify merch integration becomes powerful, as fans see products while listening.
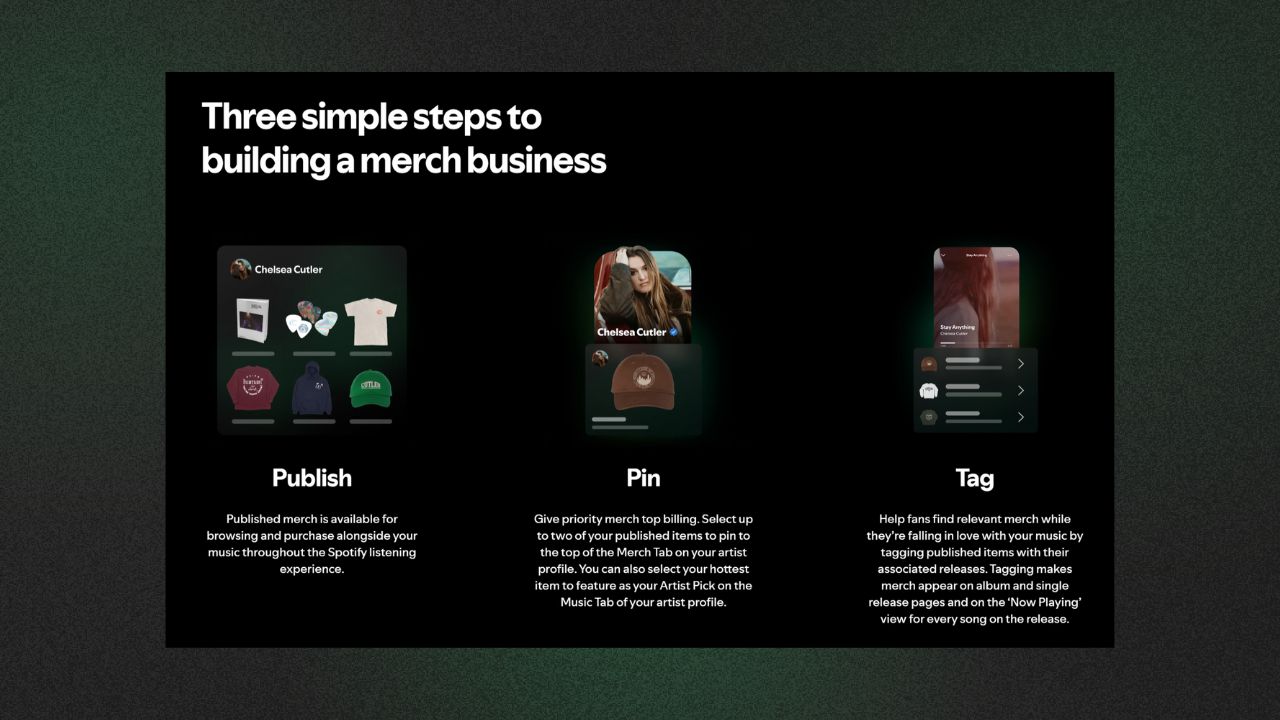
Step 4. Feature and Tag Your Merch
Publishing merch is only half the work. Visibility matters.
Feature Merch on Your Artist Profile
You can pin up to three merch items:
- Choose bestsellers or high-margin items
- Highlight merch tied to your latest release
Featured items appear at the top of your Merch tab.
Tag Merch to Music Releases
You can tag specific merch to:
Tagged merch appears directly on release pages and the Now Playing screen, increasing impulse purchases.
Update Featured Items
Rotate featured merch regularly:
- New releases
- Tour announcements
- Limited drops
Keeping merch fresh improves engagement.
Step 5. Manage and Refresh Merch Regularly
Selling merch on Spotify works best when it is actively managed.
Track Performance
Use Shopify to:
- Monitor sales
- Track product performance
- Identify best-selling items
Spotify for Artists can also help you understand when fans are most engaged.
Update Merch for New Releases
Whenever you drop new music:
- Add release-specific merch
- Swap older products out of featured slots
This ties merch sales directly to listener excitement.
Keep Your Store Clean
- Remove out-of-stock items
- Update designs periodically
- Ensure product links are always working
An active store converts better than a stagnant one.
FAQs
1. Do I need Shopify to sell merch on Spotify?
Yes. Shopify is required to enable selling merch on Spotify.
2. Can I sell merch on Spotify without inventory?
Yes. Using print-on-demand allows you to sell without holding stock.
3. How many merch items can I list on Spotify?
You can list many products via Shopify, but only a limited number can be featured on your profile at once.
4. Where does merch appear on Spotify?
Merch appears on your artist profile, release pages, and the Now Playing screen.
5. Can independent artists sell merch on Spotify?
Yes. Any artist with Spotify for Artists access and a Shopify store can sell merch.
We at GreaseRelease, have a bunch of curators on our network who are looking for new & exciting music to push on their massive playlists. If you make music and want to reach a wider audience, check out our submission platform and get a chance to reach millions of listeners! Submit your tracks now!
Don't miss my newsletter!
Join me on a music entrepreneurship journey with new tips and tricks delivered straight to your inbox.
We hate SPAM. We will never sell your information, for any reason.