How to Set Up a Home Studio on a Budget
Feb 19, 2026
You don’t need thousands of dollars to set up a studio and make professional-sounding music.
With the right essentials, a bit of smart planning, and a basic understanding of recording, you can build a clean, efficient home recording studio without draining your savings.
This blog walks you through exactly what you need to create a powerful home studio setup step by step. Here’s a simple, practical, no-fluff guide to building your home music studio.
- Step 1: Start With the Core Home Studio Equipment
- Step 2: Choose the Right Software (DAW )for Your Home Studio Setup
- Step 3: Acoustic Treatment for Your Room
- Step 4: Set Up Your Recording Chain Correctly
- Conclusion: Focus on Skill First, Upgrade Later
Step 1: Start With the Core Home Studio Equipment
When setting up a home recording studio, most beginners waste money on gear they do not actually need. The smarter move is to build your foundation first and expand later.
Think of this as your minimum viable home studio equipment list. If you get these essentials right, your home studio setup will already be powerful enough to record high-quality music.
Home Studio Equipment Checklist
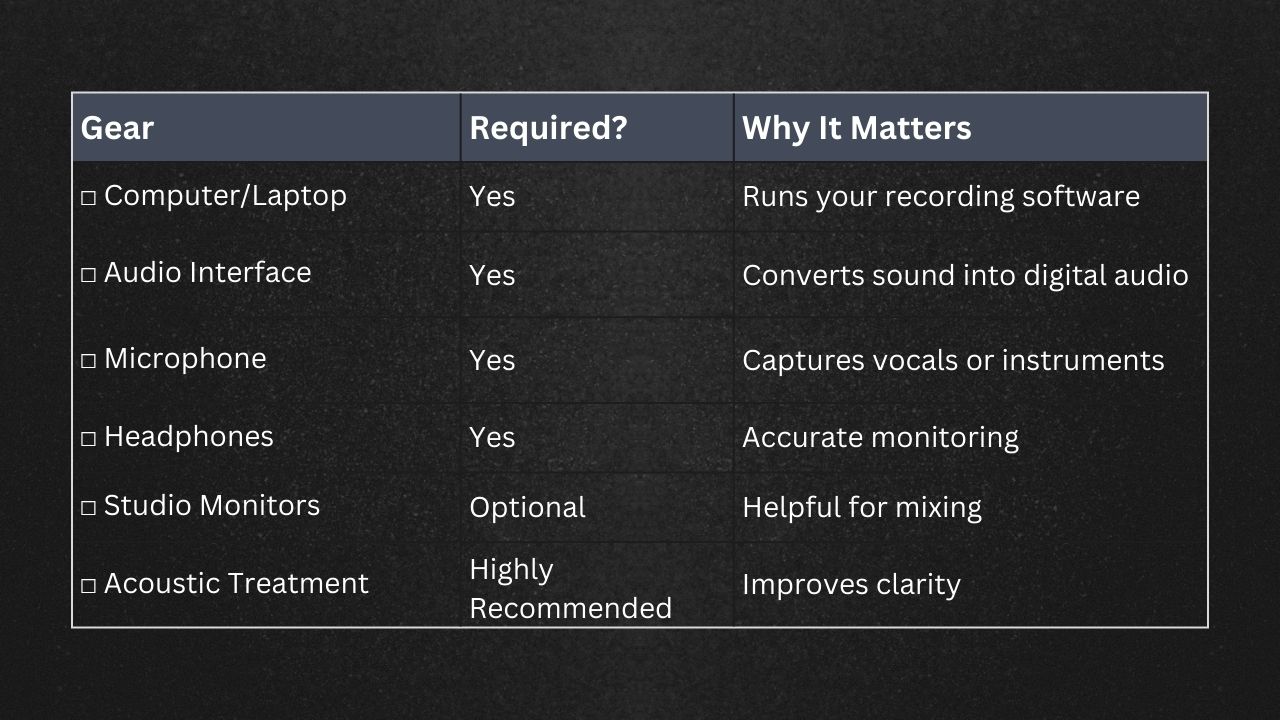
1. Computer or Laptop
Your computer is the brain of your home recording studio equipment. It runs your DAW, stores your sessions, and processes your plugins. You do not need the latest model, but what matters is stability. Minimum specs:
- 8GB RAM
- Reliable processor
- Enough storage for sessions
You do not need the newest model. Optimize what you already have by closing background apps and keeping your system clean.
2. Audio Interface
An audio interface is what separates an amateur setup from a proper home studio setup. It converts your microphone signal into clean digital audio and dramatically improves sound quality compared to built-in sound cards. Look for the following :
- 1 to 2 inputs
- Phantom power for condenser mics
- USB connectivity
This is one of the most important pieces of home studio equipment, so do not skip it.
3. Microphone
You only need one good microphone to start your home music studio. Do not fall into the trap of buying multiple microphones before mastering one. Here is a quick decision table:
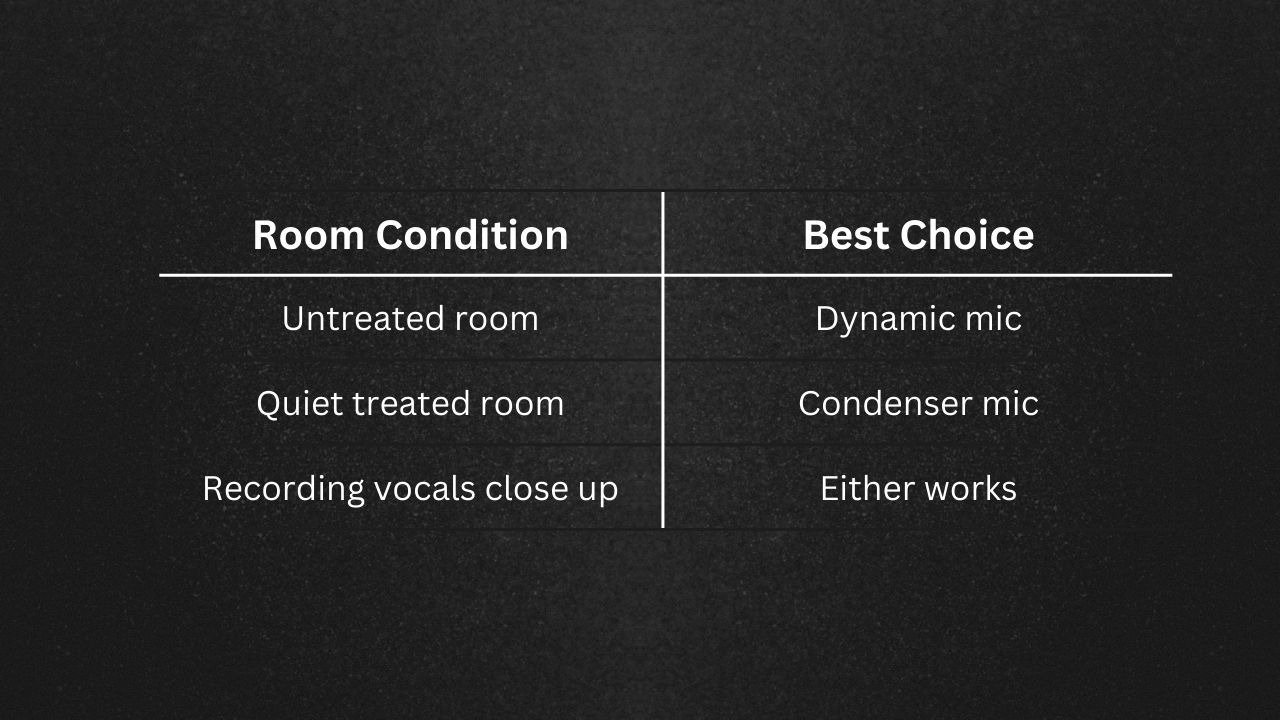
4. Headphones or Monitors
If you are tight on budget, start with closed-back headphones. They prevent sound bleed while recording and work well in untreated rooms. Studio monitors can come later when your home studio setup evolves.
Step 2: Choose the Right Software (DAW )for Your Home Studio Setup
Your DAW is the control centre of your home recording studio. This is where you record, edit, mix, and export.
Beginner Friendly Options:
- Audacity – Free and simple
- Reaper – Affordable and powerful
- GarageBand – Free for Mac users
- FL Studio – Popular for producers
Most home recording studio equipment bundles include a free version of a DAW. But also know that your skills matter more than the software.
Step 3: Acoustic Treatment for Your Room
Here is something most beginners overlook when building a home music studio. Your room affects your sound more than expensive gear. If your room echoes, your recordings will sound amateur even with premium home studio equipment.
Instead of covering every wall with foam, do this:
- Record in a smaller room
- Add carpets and curtains
- Place a mattress or thick blanket behind you
- Avoid empty rooms with hard surfaces
- Position your mic away from walls
These small adjustments dramatically upgrade your home studio setup.
Step 4: Set Up Your Recording Chain Correctly
Once you have your home recording studio equipment, you need to connect and use it properly. A good setup ensures clean recordings from the start.
Understanding your signal flow will make your entire home recording studio easier to manage and troubleshoot.
Basic Signal Flow
Microphone → Audio Interface → Computer → DAW
Gain Staging Made Easy
Gain staging simply means setting your recording levels correctly. If your signal is too loud, it distorts. If it is too quiet, it becomes noisy when boosted later.
Aim to keep levels between -12 dB and -6 dB while recording. Avoid red peaks at all costs. A clean recording is the foundation of every great home music studio production.
Reduce Noise in Your Home Recording Studio
Before you press record, take a minute to control your environment. Small distractions can ruin an otherwise perfect take.
Turn off fans and AC, close windows, use a pop filter, and maintain proper mic distance. These habits instantly improve your home studio setup without spending a single extra dollar.
What Does a Budget Home Recording Studio Cost?
Here is a realistic entry-level estimate:
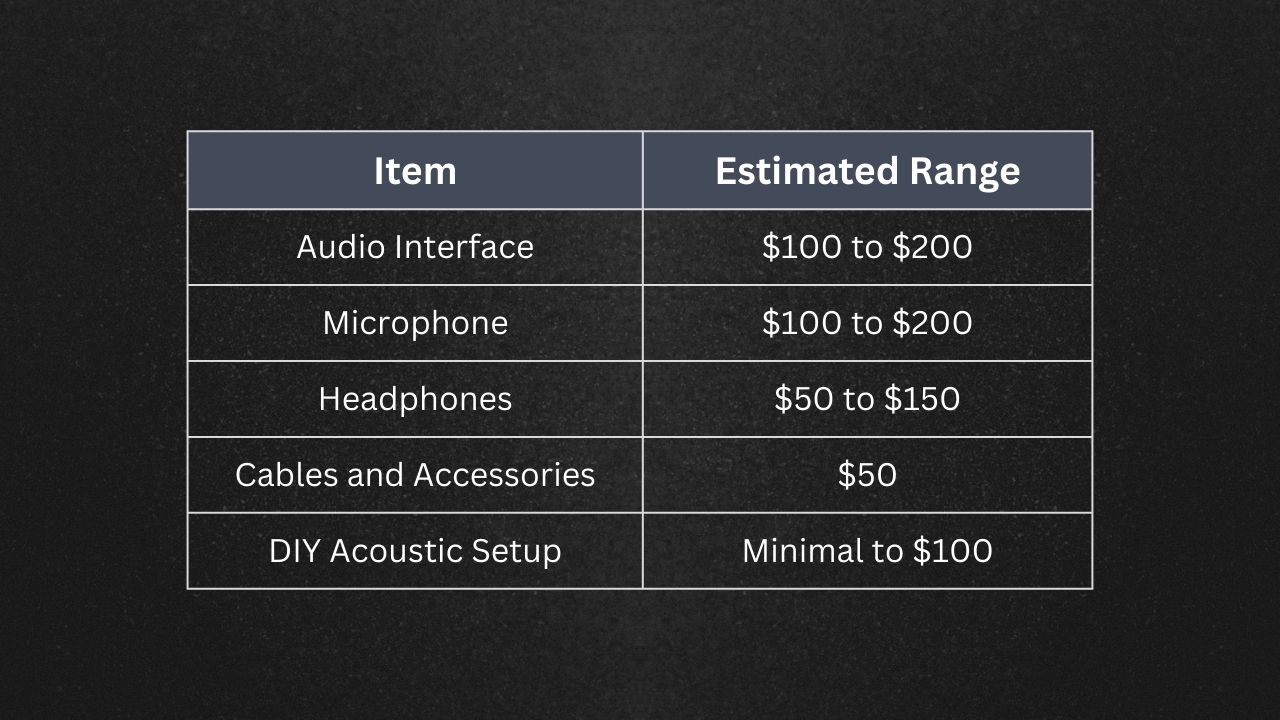
You can realistically build a functional home recording studio between $300 and $600. That is enough to launch a serious home music studio if you focus on skill development.
That’s exactly why we built this Studio Equipment Budget Calculator.
Instead of guessing what to buy, this tool helps you allocate your budget intelligently based on what you care about most. Whether you’re prioritizing recording quality, production, or mixing, you can adjust the importance of each category and instantly get a custom gear breakdown that makes sense for your setup.
This is a super easy and practical starting point that will give you a list of equipment tailored to your budget and priorities.
Check out the full Studio Budget Calculator here for FREE
Conclusion: Focus on Skill First, Upgrade Later
Building a home studio setup is about smart decisions, not expensive gear. Invest wisely in your interface and microphone. Improve your room before upgrading monitors. Avoid buying premium plugins before mastering the basics.
Your home music studio will grow as your skills grow. Upgrade when your creativity demands it, not because marketing tells you to.
Start simple. Learn deeply. Improve gradually. That is how you build a powerful home recording studio on a budget.
We at GreaseRelease, have a bunch of curators on our network who are looking for new & exciting music to push on their massive playlists. If you make music and want to reach a wider audience, check out our submission platform and get a chance to reach millions of listeners! Submit your tracks now!
Don't miss my newsletter!
Join me on a music entrepreneurship journey with new tips and tricks delivered straight to your inbox.
We hate SPAM. We will never sell your information, for any reason.